
VPan Hasselblad Panoramic Film Back Assembly
Basic assembly instructions for my Hasselblad Half-Frame Panoramic “VPan” Film Back. The process includes installling masks for the top and bottom of the frame and taking out the gear that links the film back and the body. Taking out this gear prevents the body from advancing full frames and thus wasting a lot of the film.
Click the button to go to my Google Drive Folder with the files to 3D print for the Masks and Gear Spacer.

To start off with you will need an old style film back. One with a peephole in the back to see the backing paper and a flip out winding key to manually advance the film.
To get access to the gears you will need to remove the side panel covering them. This can be accomplished by removing the following indicated screws and gently prying the panel way from the rest of the back. If you are too forceful you will dent the aluminum.

This first screw is on the inside of the body. You only need to remove the one in the middle.

The next screws you will need to remove are on the three on the side of the back. I do not believe that these are all the same size so keep in mind which screw goes in which hole.

After removing the side panel you will first need to remove the winding key by removing the screw holding it in place. Next you will remove the plate holding the gears in place. There are 3 screws holding this in place.

I forgot to take a picture of the gear layout before the next steps so this is a picture of how things look. In your back there will be two additional gears, one on the top spool (this one contains a coil under tension so watch out) and one underneath the gear with an arrow pointing to it.

Once removing those two gears you will need to put a spacer on the post holding both of them to take the space of the original gear on bottom. I have designed a piece for this purpose but did not have it when I built mine so I used tape wrapped around it.
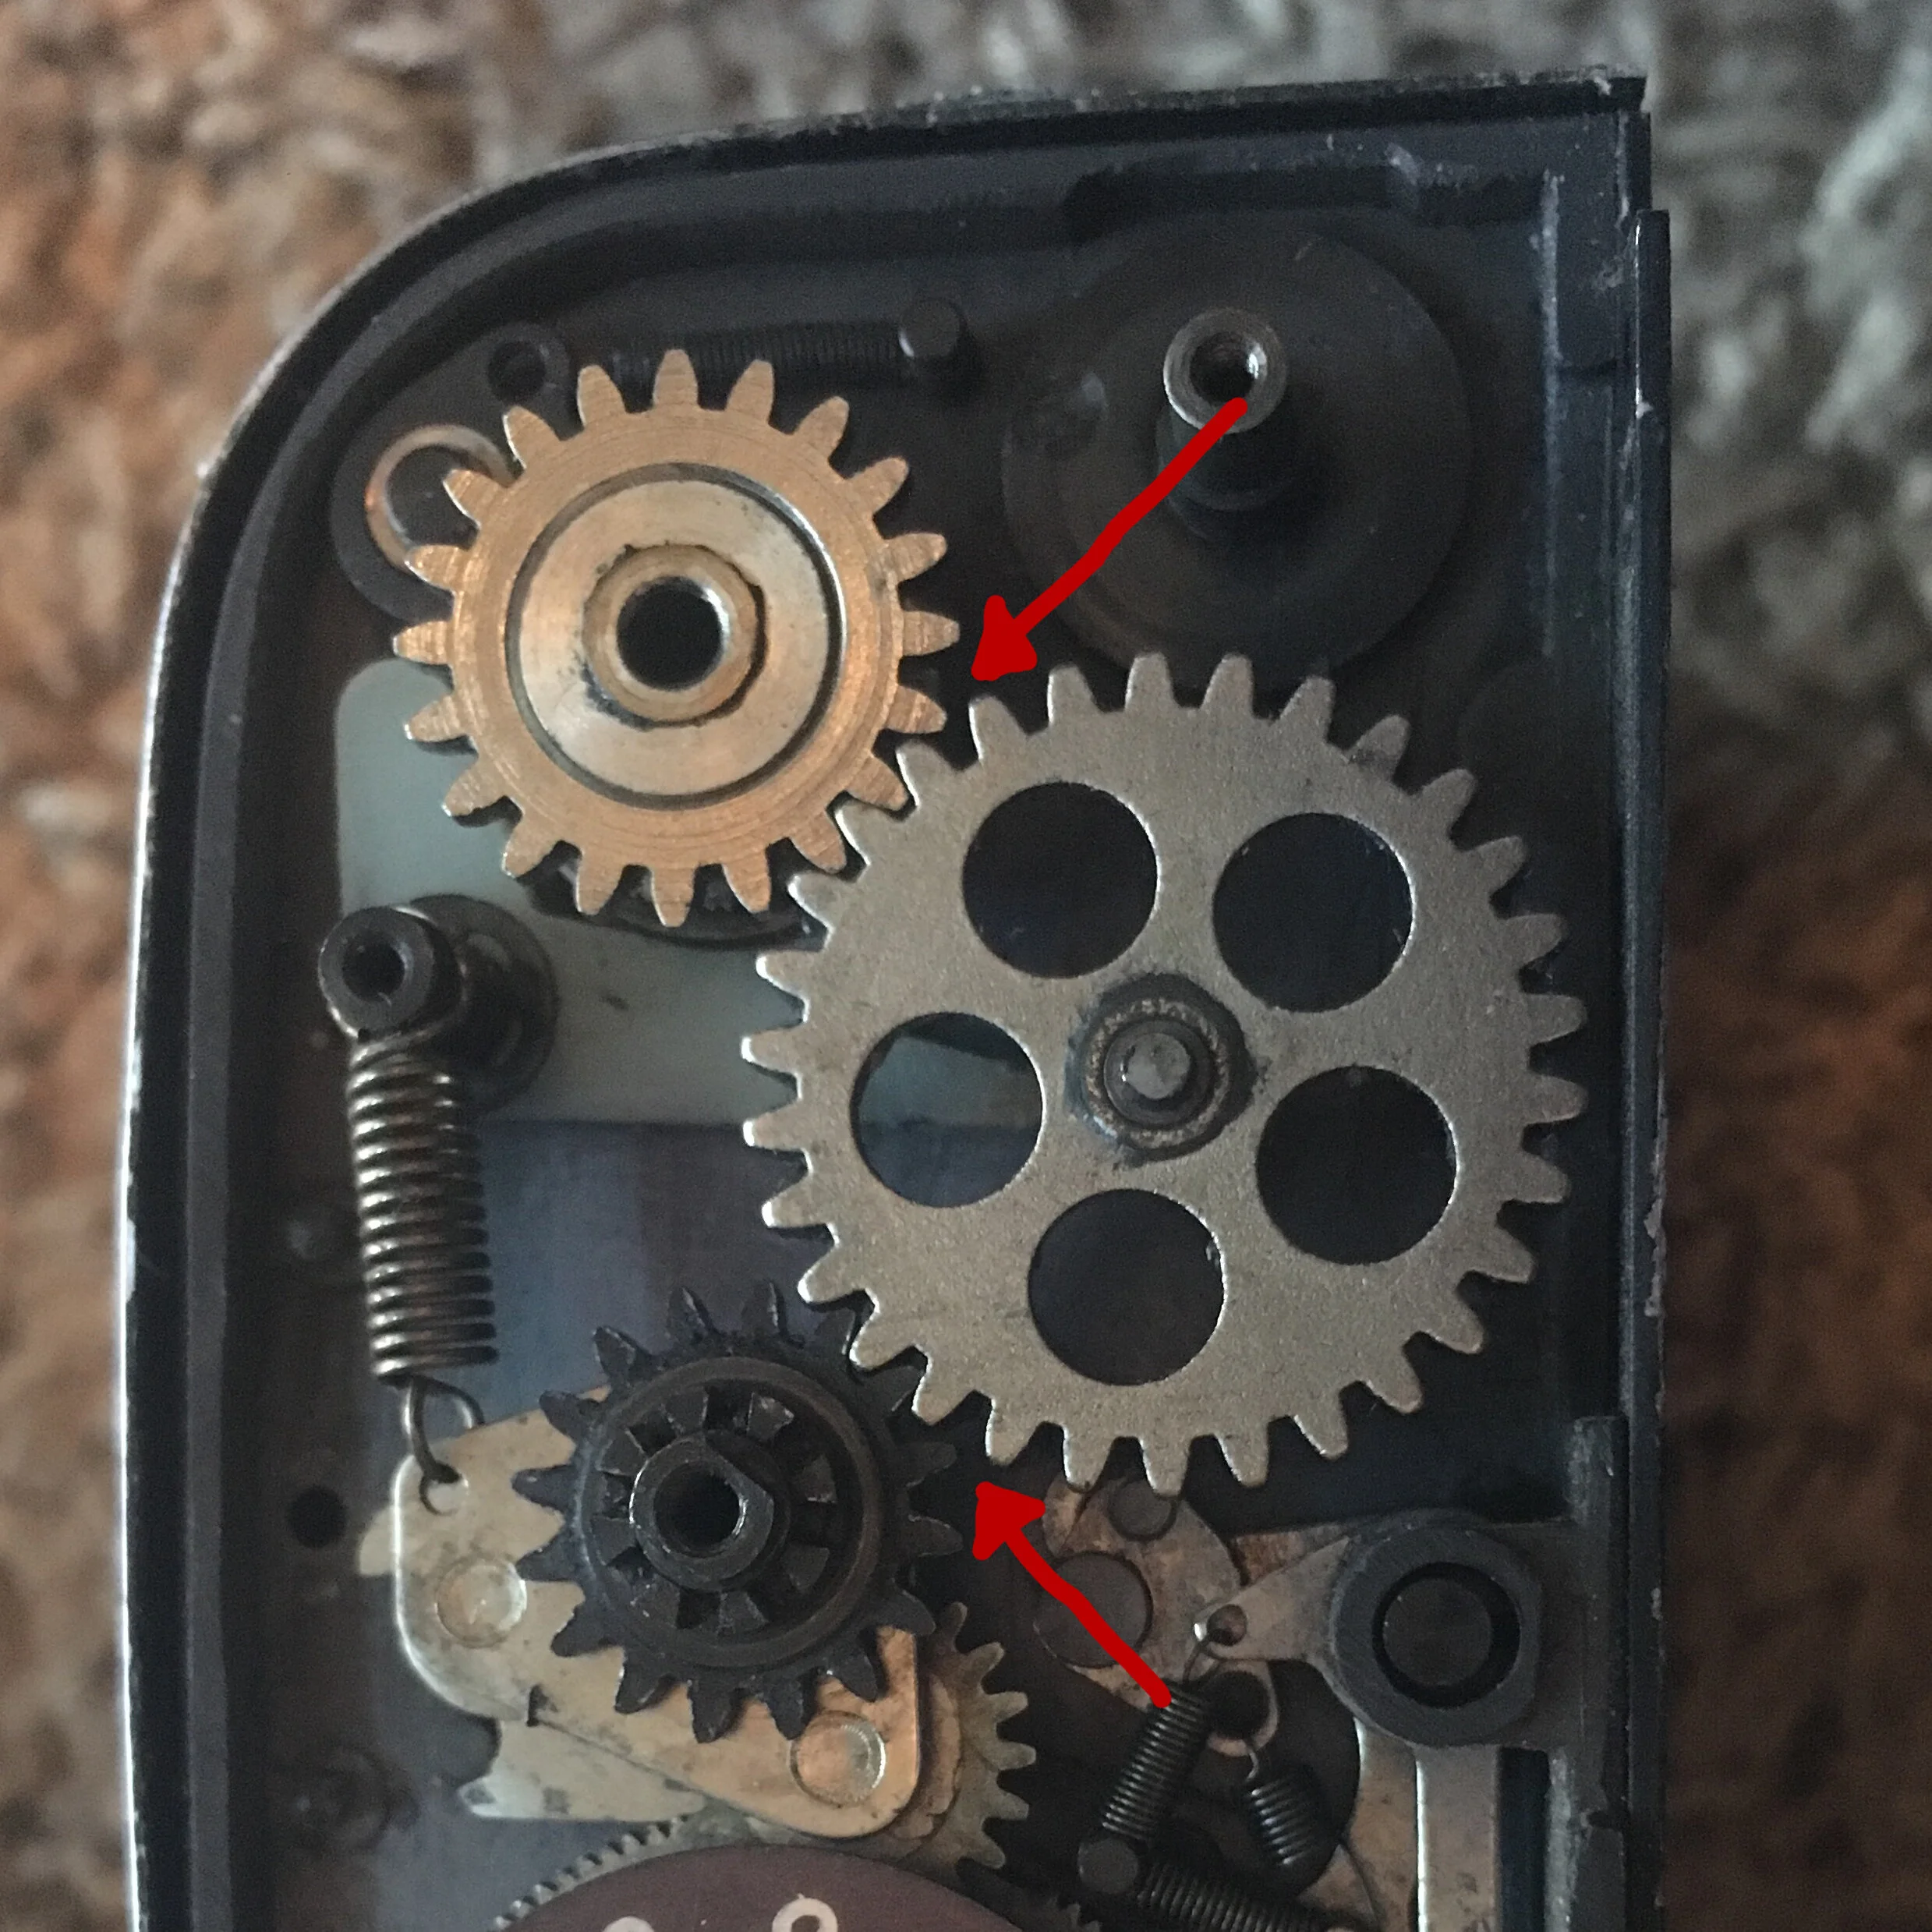
When putting this gear back in place make sure it properly interfaces with these two gears. The top one actually advances the film and the bottom one advances the film counter window.

This is the hardest part about reassembly, replacing the winding key.
The little hook on the winding key (top arrow and blue highlight) has to catch on the teeth on the winding bit that it sits on top of (bottom blue and arrow). I've found that using some simple tape with the stickyside facing down can hold the hook in place long enough and far enough away for the crank to sit where it needs to. The tape can be removed with little residue.
Be sure to test the winding mechanism before placing the cover back in place. If you did it correctly the frame numbers should advance and reset as normally. When turning the crank, pay attention to the top gear, this is the gear that actually advances the film inside the cassette.
There is an additional optional step you can performat this point and one I found useful for frame advancing is to mark halfway between the numbers on the frame number wheel.
From here you can screw the cover back on and we can move onto installing the masks.
Replace the plate holding everything in place and screw it into place.
The 3D printed masks should be the right size but if necessary they can be sanded down to fit.

To install the masks used 1” black gaffers tape and cut to longer than the masks themselves this uses the tape as part of the light masking process. Make sure to get good adhesion so that the insert doesn’t catch and pull off the tape. Also make sure that the dark slide goes in and out without catching on the top of the masks themselves. This was problem with my initial prototypes and why I moved to 3D printed parts as opposed to other materials like mattboard.

Also note that the masks do have a correct orientation. Pay attention to the edge contours. This illustration can be used for proper orientation. Basically the Concave Outside Edge sits right up against the rollers on the top and bottom. The bottom goes against the film.

The final optional step making marks on your viewfinder for framing. What I did was take another strip of 1” gaff tape and put it across the middle of my focusing screen and mark on top and bottom of it.
Congrats on finishing your modification and definitely share your results.
Some final notes on use. Make sure to look up a tutorial on loading the film as it’s not quite as easy as the newer backs. After loading, winding, and shooting your first frame wind to half way to 2 and then reset the counter to 1, this will ensure that you get the maximum number of frames. From there out wind to half way between each number on the frame counter. This should give you around 23 frames.